
What is it?
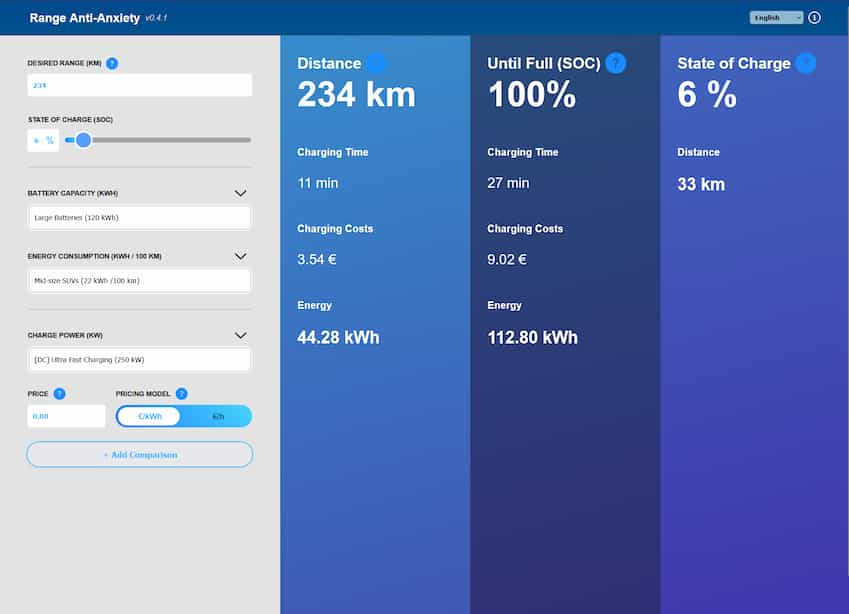
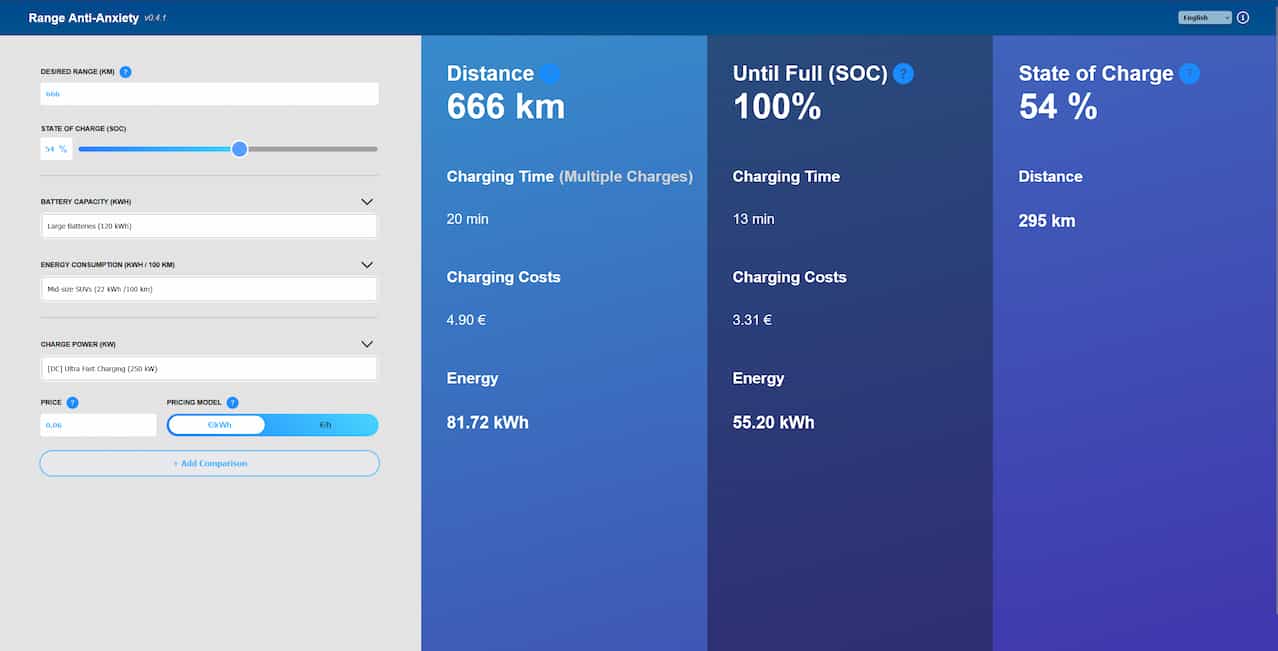
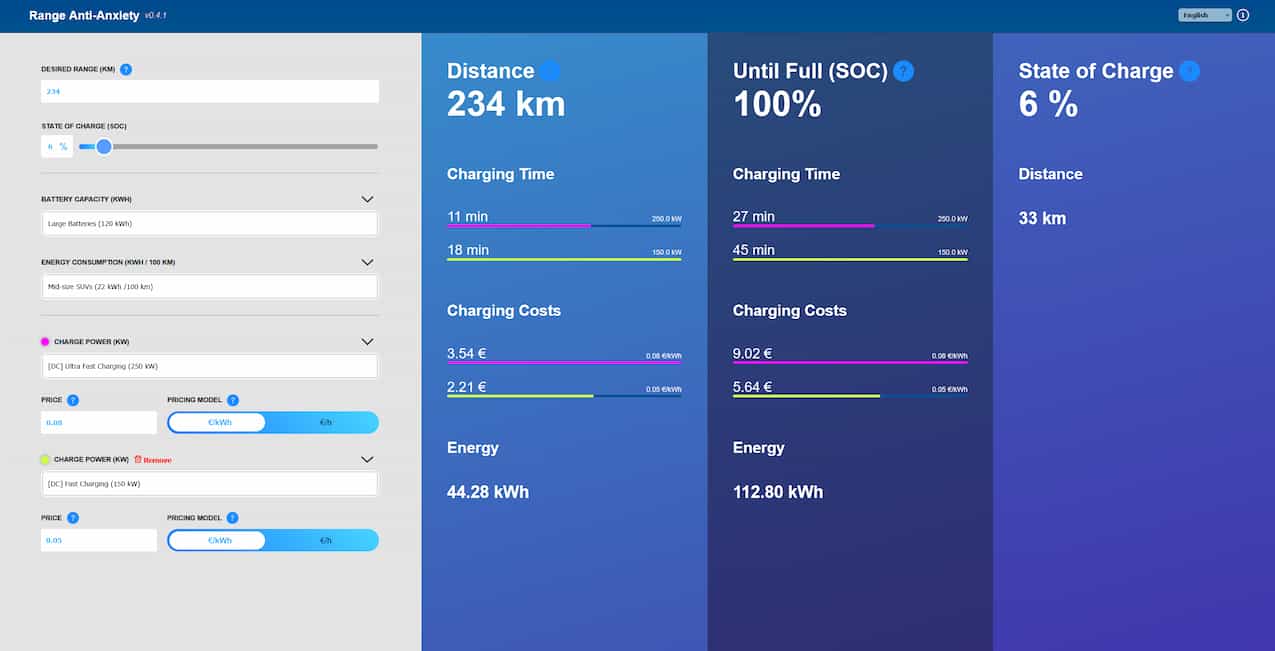
Range Anti-Anxiety is a calculator website for electric vehicle related issues. Users can estimate their car's current range, how much they would need to charge to reach a given distance, how long it would take and how much it would cost. The calculator also has an option for comparing two charging setups. The calculations are only simple estimates due to the very complex nature of all the real world variables involved. The project was completed as the bachelor's project of my degree and it was a group project.
Background
During the last year of my bachelor's studies I had to complete a "Bachelor's project" course. Students were grouped and assigned to different projects based on our listed skills and interests. The different projects varied a lot from mobile applications to backend stuff and even a few research projects. These projects involved real companies or the university's internal actors. I along with five others were assigned to the "Range Anti-anxiety" project. I can't mention the company, however, my group retained rights to the project so I can talk about it.
The idea of the project was to create an "educational" calculator for Battery Electric Vehicle (BEV) drivers. The calculator's purpose was to ease the "range anxiety" (=driver's fear that a vehicle has insufficient energy) by giving quick estimates on range, charge, cost, time related questions. Completely accurate results would have been basically impossible and way beyond the scope of the course as everything from weather to the car's age affects its battery usage.
Our project group was given a few core requirements from our client but we mostly had free reign over desinging and implementing the calculator. From the university's perspective the point of the course was to simulate a software project which meant we were assigned roles, had to plan the use of our resources (time), attend client meetings and have our own group meetings and so on. My role was essentially the lead developer role as I was the most experienced in the group. Other roles included the project manager who communicated with the client and planned the project timeline, UI/UX designer, developer, tester. These roles were not strictly set in stone so we could help each other out and move between roles when required.
In the next sections I'll go over a few things related to the implementation and issues I encountered while working on the project. I'll also include a few code snippets.
Project structure
The core of the calculator consists of three parts: input fields, results display and the internal calculations. Essentially when the user inputs values the field sends an update request to the calculator which then updates the calculated values in real time so the user can play around with values and see their effects. Nothing too fancy. I was responsible for implementing the input fields and sections as well as designing them to be connectable to the calculator part.
I decided to create each input element as its own JavaScript class. Each class is responsible for that type of input element. Additionally all the classes share a common base class for handling input. The purpose of this was to make testing easy and reduce points of failure. Below is some pseudocode showcasing the structure:
// BASE CLASS FOR INPUT ELEMENTS
export class InputField {
  #defaultValues = null;
  setDefaultValues(elements, defaultValues) {
    // Looks for "data-property" attribute in the elements
    // Then initializes element.value and element.dataset.value using property as a key for defaultValues
  }

  handleInput(inputField) {
    // Calls different handling methods based on data-type set in HTML
  }

  // Essentially inputs block any NaN value, clean up decimal values
  handleIntegerInput(inputField) {
  }

  handleDecimalInput(inputField) {
  }

  cleanUpOnFocusout(inputField, allowEmpty) {
    // Related to decimal handling. Cleans up the visible value after user is done
  }

  storeInputValue(property, value) {
    // (users need to type in their car's details only once)
  }
}
Then each input element class extends the base class. As I mentioned each input element class is reponsible for all input elements of that specific type. For example the below handles the logic of all sliders:
export class RangeInputHandler extends InputField {

    #calculator = null;

    constructor(calculator, initialValues) {
      // Initialize class
      // Obtain all slider elements from document
      // Set their initial values
      // Add EventListeners
    }

    // Each slider also has a field so users can either type or use the slider
    // the event listeners update values for the fields, send them to the calculator,
    attachEventListeners() {
        document.addEventListener("input", (inputEvent) => {
            if(inputEvent.target.classList.contains("rangeInput")) { // For the slider part
              // Get element based on its target
              // Updates the field & the slider with handleInput
              // informs calculator of changes
            }

            if(inputEvent.target.classList.contains("rangeInput-field")) { //  For the field part
              // ...
            }
        });
        // Other listener types...
    }

    handleInput(inputField, slider) {
        super.handleInput(inputField);
        slider.value = inputField.dataset.value; // Override sets the slider as well
        slider.dataset.value = inputField.dataset.value;
    }

    updateSliderProgressBar(slider) {
        // Fills the slider background
    }
}
Finally the main creates these input handler objects and the calculator. It tries to initialize the fields using local storage. Additionally main contains some logic for first time introduction, localization and some event handling.
// Inside main.js
const savedInputData = JSON.parse(localStorage.getItem("inputData")) || {};
const initialValues = {
    ...BASE_VALUES,
    ...savedInputData
};

const calculator = new Calculator(initialValues);

document.addEventListener('DOMContentLoaded', async () => {

    // Localization initialization...

    // Initialize input handlers...
    const dropdownInputHandler = new DropdownInputHandler(calculator, initialValues);
    const numberInputHandler = new NumberInputHandler(calculator, initialValues);
    const rangeInputHandler = new RangeInputHandler(calculator, initialValues);
    const toggleInputHandler = new ToggleInputHandler(calculator, initialValues);

    // Initialize the first time use...
    initializeFirstTimeUse();

    // After initialization has completed, now we can update calculations
    // This ensures calculator results are the last thing to modify the DOM
    setTimeout(() => {
        calculator.updateCalculations();
    }, 0);
});
I won't get into detail how the calculator class works as the code is
very long (and a bit messy), but essentially it stores the values that the fields give it and when
updateCalculations is called it calculates and updates
the values for the result display.
The plan was to refactor the class to be more separate from the results display, however,
the person responsible for the calculator script didn't want to accidentally break anything
which is fair enough.
Issues & Solutions
Localization
Localization was not a requirement set by our client, however, when coming up with ideas for further development it came up.
In a meeting our client accepted some of these ideas as we were ahead of schedule. When designing the localization we decided to use localization files and HTML data attributes to make it easy.
Essentially each element that requires localization sets a data-localization="key.to.item" to match the localization file. Then our LocalizationManager swaps the text content matching the current locale.
The localization first checks if the local storage already has a language set for the user (they have previously selected one from the dropdown). If not, then it tries to check for the user's browser language. Finally it has an English fallback. The idea is to automatically apply the language the user prefers if it is available.
I decided to make the LocalicationManager a singleton so it can easily be accessed as the website is frontend only. In the process I learned that with JavaScript you can use modules for getting the instance which is pretty cool.
class LocalizationManager {
  constructor() {
    if(!LocalizationManager.instance) { // Singleton pattern utilizing modules
      this.currentLanguage = 'en';
      this.translations = {};
      LocalizationManager.instance = this;
    }
    return LocalizationManager.instance;
  }

  async initializeLanguage() {
    const languageSources = {
      "localStorage": localStorage.getItem("language"),
      "browser": navigator.language.split("-")[0],
      "defaultFallback": "en"
    }
    // Then tries to load a language based on the above priority
  };

  async loadLanguage(languageCode) {
    // Tries to access the language file
    // then calls updatePageText if language was found
  }

  getText(path) {
    // Gets the localization text from the JSON using the path (key)
  }

  updatePageText() {
    // Saves language setting
    // Updates all texts etc...
  }
}

// Singleton access via modules:
const localization = new LocalizationManager();
export default localization;
Dealing with tooltips
When making tooltips I ran into many issues mainly with CSS. While the concept is simple, creating a "universal" tooltip that can easily be just placed anywhere took a bit of trial and error. At first I tried to only use CSS for it and it didnt really work. The tooltips easily overflowed and were all over the place. In the end the solution is pretty simple. I created a script responsible for setting the tooltip position. It checks in which quadrant of the screen the tooltip "(?)" icon is located in. Then it calculates the offset based on that so the tooltip is always on screen properly next to its icon.
function handleTooltipActivation(element) {

    const tooltipKey = element.getAttribute("data-tooltipkey"); // Each tooltip-container should define a key for localization so the text can be set
    let elementBounds = element.getBoundingClientRect();
    let tooltipBounds = tooltip.parentElement.getBoundingClientRect();

    const offSet = window.matchMedia("(max-width: 900px)").matches ? 0 : 10; // Different offset for mobile and desktop
    // This calculation relies on that tooltip has position: fixed
    let left = elementBounds.left + elementBounds.width / 2 + offSet;
    let top = elementBounds.top + elementBounds.height / 2 + offSet;

    // Position the tooltip based on which quadrant of the screen the element being hovered is in
    // This is to prevent it from overflowing outside of the page
    let position = {
        top: "auto",
        right: "auto",
        bottom: "auto",
        left: "auto"
    };

    // Check if element is in the top or bottom half of the screen
    if (top > tooltipBounds.height / 2) { // Bottom half
        position.bottom = `${tooltipBounds.height - top + offSet}px`;
    }
    else { // Top half
        position.top = `${top + offSet}px`;
    }

    // Check if the element is in the left or right half of the screen
    if (left > tooltipBounds.width / 2) { // Right half
        position.right = `${tooltipBounds.width - left + offSet}px`;
    }
    else { // Left half
        position.left = `${left + offSet}px`;
    }
    // Finally, set the position and the tooltip text
    showTooltip(tooltipKey, position);
}

function showTooltip(tipKey, position) {
    // call localization to get the new text using the key
    tooltip.textContent = localization.getText(tipKey);
    // Adjust position
    tooltip.style.top = position.top;
    tooltip.style.right = position.right;
    tooltip.style.bottom = position.bottom;
    tooltip.style.left = position.left;
    // Display it
    tooltip.style.display = "flex";
}

function hideTooltip() {
    tooltip.style.display = "none";
}
Automated tests
At some point we discussed testing of the calculator and automated tests came up. While I was not responsible for creating the individual test cases, I did setup the testing libraries and configure a simple CI/CD pipeline for our github repository (simply runs tests when code is pushed). I also assisted a bunch with other issues related to the tests. While the tests themselves are simple, configuring them to work was not.
Turns out that using JavaScript modules made testing configuration a lot harder as the JEST library only had experimental support for them.
In addition we used UserEvent to test the input section. In the end the configuration is not complex but finding a solution by combing through documentation,
StackOverflow and a sprinkle of AI I managed to get the tests to run both locally and on github. The solution was to set these in the package.json file:
"type": "module", "scripts": ""node --experimental-vm-modules node_modules/jest/bin/jest.js tests/"
and finally these in the "jest" configuration: "transform": {} (override defaults) and use "testEnvironment": "jsdom".
Check out the source code for the configuration files and tests if interested. The tests print a lot of errors in the console, however, they still work fine. I suspect this is due to race conditions with the JSDOM manipulation. I decided to let it be as the tests pass/fail as they should and since tests were an internal helper for spotting if we accidentally broke something.
Last updated: 24/09/2025